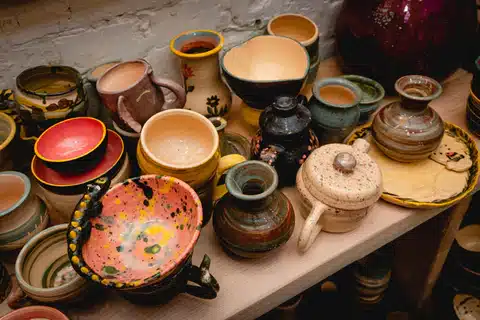
5 Simple and Stunning Glazing Techniques to Try at Your Next Pottery Session
There is a certain industrial charm about unglazed pottery but that’s not all we’re limited to. Instead, expand your artistic horizons with glaze – a mixture of ingredients like silica, alumina as well as different colourants to simultaneously strengthen and colourfully embellish your ceramic pieces. Lending a glassy and glossy finish, glazed pottery tends to be much more resistant to the elements such as water, heat and chemicals, enhancing their durability and functionality. It is typically done before the final round of firing and one of the final stages to let your creativity run wild before you wrap up your artmaking experience.
Ceramists have at their disposal a whole range of glazing techniques to try individually or mix and match with. While some are straightforward and simple, others require a bit more focus and finesse for their complexity. A combination of multiple techniques can proffer original and eye-catching works of art that are one of a kind and never-before-seen – a fancy, we’re sure, is shared by artists all over the world. Whether you’re an experienced potter who wants a refresher on the existing glazing techniques, or a budding ceramist who needs a crash course on the different styles to define your niche, we have here the most widely used methods for glaze application. Check them out and set forth on creating phenomenal bisqueware at your next pottery session!
1. Dipping
Here’s a speedy way to coat your vessel in glaze. Incredibly fast and easy, dipping or immersion is one of the most common techniques applied by both novices and veterans alike. Defined by its simple process of plunging the pottery directly into a bucket of glaze, artists can control the thickness of the coverage by repeated layering. Usually, thinner layers are achieved by two rounds of dipping for a base layer prior to decoration; while thicker layers are achieved by dipping twice or more for a solid and deep coating.
As uncomplicated as it sounds, dipping has its critical areas that make or break the success of its process. Here are some of them:
Consistency: Ensure that the consistency of the glaze aligns with your intended effect. Overly thick glaze can result in patchy appearances, and thin ones can easily run and make things messy. Your glaze should also be well-mixed, preferably through a high speed mixer, and strained with a glaze sieve to get rid of clumps and large particles.
Draining the Excess: Applying too much glaze or not allowing the glaze to drip off can lead to defects like cracking, flaking and bubbles. Time yourself when dipping the pottery and allow the piece to drain properly by holding it up, or gently shaking. You may also use a soft-bristled brush to remove any excess glaze from the bottom of the piece so that it doesn’t stick to the kiln shelf when firing.
Form and Movement: Ensure that you are comfortable holding your position when dipping your pottery. Your movement should be steady, with your pottery immersed evenly and at a timely pace. Consider using tools such as tongs to help you get a tight grip of your work. Depending on the surface you’re glazing, you can accommodate the size and depth of your bucket or dish to your ease and vision for better coordination.
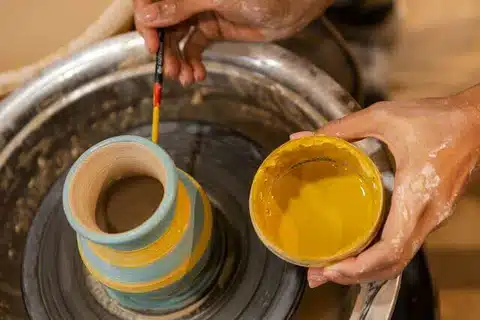
2. Brushing
Precise and controlled brushstrokes can bring definition and detail to your pottery. Following the footsteps of painting, brushing involves much practice for a steady hand that can maneuvre the brush effectively. With enough time and patience dedicated to understanding the level of force, hand positions and appropriate angles to manipulate the brush, you can learn to materialise the fine lines, flowing strokes, blending or any other effect you desire with precision.
However, it is important to note that painting with glaze on bisqueware is a completely different experience compared to painting on canvas, paper or other mediums. As you would be working with a rough and sometimes powdery surface, it is best to use soft-haired brushes to sop up sufficient glaze and avoid streaky textures, especially if you are painting over a large area with broad strokes. On the other hand, if you are using the brushing technique to add accents and details such as patterns, look into using smaller brushes. Small, hard and sharp brushes are easier for creating thin lines seen in intricate designs, preventing unwanted overlap and the unintentional conglomeration of colours.
3. Splattering
Take a free and easy way to create haphazard, avant-garde patterns on your ceramic pieces by way of splattering. Involving the splattering of glaze resulting in miniscule speckles sprinkled across the surface of your works, splattering can add significant texture, depth, complexity and visual interest while being a fun and unconventional method of application.
With hundreds and thousands of dots flecked in a single sweep, this glazing technique makes for a good way to introduce vibrant and eclectic features for your creations. During the splattering process, consider using more than one colour for brilliant and bold splatters. These could lend an abstract and contemporary look to your works.
Even within splattering, there are several methods artists could use to deploy dynamic effects. Here are some of them:
Straw Splattering: Loose and fluid droplets can be achieved by straw splattering, which involves splattering glaze with one end of the straw before blowing through it from the other end. This is best done when you have a larger area to work with to allow the full illustration of “drippiness” similar to those in drip paintings.
Brush Splattering: Brush splattering is one of the most accessible ways to create unique and dazzling splatters. Start by dipping the bristles of your brush in glaze. Be mindful of the amount of glaze you pick up as this affects the size of your splatters. Then, position the brush near your ceramic, flicking or tapping it to direct the droplets to splash against the clay.
Toothbrush Splattering: Getting rid of an old toothbrush? With the stiff bristles of one, you can be an artist of multitudinous tiny splatters at once expressive and enchanting. Simply run your fingers along the bristles, angled towards your ceramic piece and let the glaze spread in fine droplets all around the surface of your pottery.
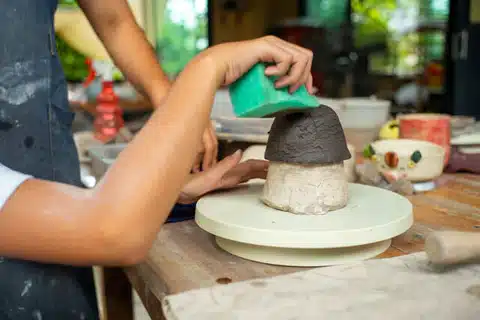
4. Sponging
Sponging is a beautiful glazing technique that creates blurred, mottled and interesting appearances on your vessels. Done with a glaze-soaked sponge, this manner of application requires you to dab the medium directly onto your works, adding an element of airy softness great for designs like clouds, flora and foliage.
There are many possibilities with sponging as a glazing technique. From traditional dabbing, which helps to produce patterns, artists can explore alternative textures of the sponge by rotating it when in use; rolling, which can result in smooth and coherent patterns when the sponge is rolled across the surface of the bisqueware; to layering, which works well for inserting detail and depth, whether in different colours or the same; sponging proves to not only be a highly versatile way of working with glaze, but also an incredibly tactile and enjoyable experience capable of adding flair and character to your pottery.
To guarantee results that match up to your vision, make sure to select sponges that fit your needs. Choose small, fine-grained and high-density sponges if you intend to use it for smaller areas and bigger, firmer sponges for larger areas. Always remember to moisten your sponge before soaking it in glaze for smooth application, and wash the sponge diligently after each use to maintain its efficacy.
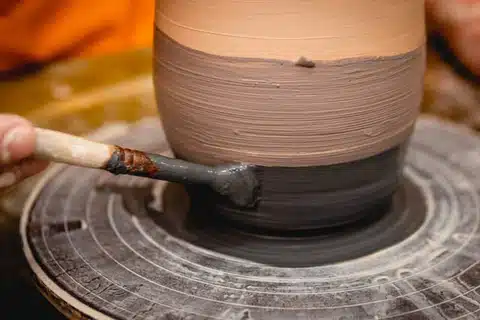
5. Pouring
Pouring is highly similar to dipping except that it involves pouring the glaze over the pottery, instead of suspending then submerging it. Like dipping, artists can effortlessly work towards even applications with pouring, and the thickness of the glaze should depend on whether or not you’re aiming for a single base layer or a solid and fully-covered surface that spans the whole piece.
Ceramic wares that are cloaked in one colour can afford approaching the pouring technique unsystematically, but artists who are striving for a more colourful display would do better with methodical practice. As a rule of thumb, always glaze the interiors of the piece first, by pouring the glaze into the vessel and letting it sit and settle before pouring it back out. This allows for the piece to absorb the colours and form a consistent layer you won’t have to revisit later when you’re working on the exterior.
In many cases, the technique of pouring is associated with the style of dripping. This is usually done after acquiring the base layer and added for decorative purposes to the piece. Artists fill up squeeze bottles with glaze, then apply it by letting the glaze drip down naturally according to their vision, controlling the spurt by its flow, direction and placement. As such, practice (and trial-and-error) may be essential to the masterful application of this technique.
Conclusion
These five glazing techniques are simple, but when executed with care and finesse can lead to complete staggering works of art on the surface of your skillfully designed pottery. As much as the build and form of your vessels matter, the outward appearance of them contribute significantly to the moods they impart to the environment too. It is also an opportunity to showcase your artistic talents beyond clay shaping.
Eager to further sharpen your aptitude for the arts? Consider Terra & Ember, a safe haven located in the heart of the city for emerging and prolific artists to hone their craft. Discover courses and workshops from wheel throwing to handbuilding, as well as slots to use our studio to work in comfort and companionship of other fellow potters. Our doors are always open for creatives, no matter your level of expertise.